
The kitchen is one of the most important rooms in any home. It is where we prepare and enjoy our meals, and where family and friends often gather to socialize. However, the kitchen can also be one of the messiest places in the home, particularly when it comes to kitchen appliances.
Keeping your kitchen appliances clean is essential for both hygiene and aesthetic reasons. Not only does a clean kitchen appliance work more efficiently, but it also helps to prevent the buildup of bacteria and other harmful germs. In addition, a clean appliance looks better and can help to create a more inviting kitchen space.
Cleaning kitchen appliances can seem like a daunting task, but with a few simple techniques and some basic cleaning supplies, it is a job that can be easily tackled. In this article, we will provide tips and tricks for cleaning some of the most common kitchen appliances, including refrigerators, ovens, microwaves, and dishwashers.
How To Clean Kitchen Appliances
Here are some tips for cleaning common kitchen appliances:
1. Refrigerator

The refrigerator is an essential appliance in any kitchen, keeping food and drinks fresh and cool. Here are some more detailed steps for cleaning a refrigerator:
- Empty the fridge: Start by removing all the food from the refrigerator. Dispose of any expired or spoiled food.
- Remove shelves and drawers: Remove all the shelves and drawers from the fridge, and wash them in warm soapy water. If any shelves or drawers are glass or plastic, be sure to handle them carefully to avoid cracking or breaking them.
- Clean the interior: Mix a solution of equal parts water and white vinegar in a spray bottle. Spray the solution onto the interior surfaces of the fridge, including the walls, ceiling, and door. Pay extra attention to any spills or stains. Use a sponge or cloth to wipe down the surfaces, and then rinse with water.
- Clean the exterior: Use a damp cloth to wipe down the exterior of the fridge, including the door and handles. If there are any stubborn stains or fingerprints, use a mixture of baking soda and water to scrub them away.
- Reassemble the fridge: Once the shelves and drawers are clean and dry, return them to the fridge. Be sure to properly align them to ensure they fit correctly.
- Restock the fridge: Return the food to the fridge, taking care to organize it in a way that makes sense and is easy to access. This is also a good time to check expiration dates and toss any food that has gone bad.
It’s a good idea to clean the fridge at least once every three months to keep it running efficiently and prevent the buildup of bacteria and other harmful germs.
2. Oven

The oven is an important kitchen appliance that is used for cooking a wide variety of meals. Here are some detailed steps for cleaning an oven:
- Turn off the oven: Make sure the oven is completely turned off and has cooled down before starting to clean it.
- Remove racks: Remove any racks, trays, or other removable parts from the oven and soak them in warm soapy water.
- Apply cleaner: Apply an oven cleaner to the interior of the oven, following the manufacturer’s instructions. Alternatively, you can create a paste using baking soda and water, and apply it to the interior surfaces of the oven.
- Wait: Allow the cleaner or baking soda paste to sit for the recommended amount of time, typically around 15-20 minutes.
- Scrub: Use a scrub brush or sponge to scrub the interior of the oven, paying particular attention to any areas with baked-on grime or stains.
- Wipe clean: Use a damp cloth to wipe down the interior of the oven and remove any leftover cleaner or baking soda paste.
- Clean the door: Wipe down the oven door and exterior with a damp cloth. If there are any stubborn stains, you can use a mixture of baking soda and water to scrub them away.
- Reassemble: Once the oven and its parts are clean and dry, reassemble it.
It’s a good idea to clean the oven every three to six months, or more frequently if you use it frequently. Regular cleaning will help keep your oven running efficiently and prevent the buildup of grease and grime.
3. Microwave
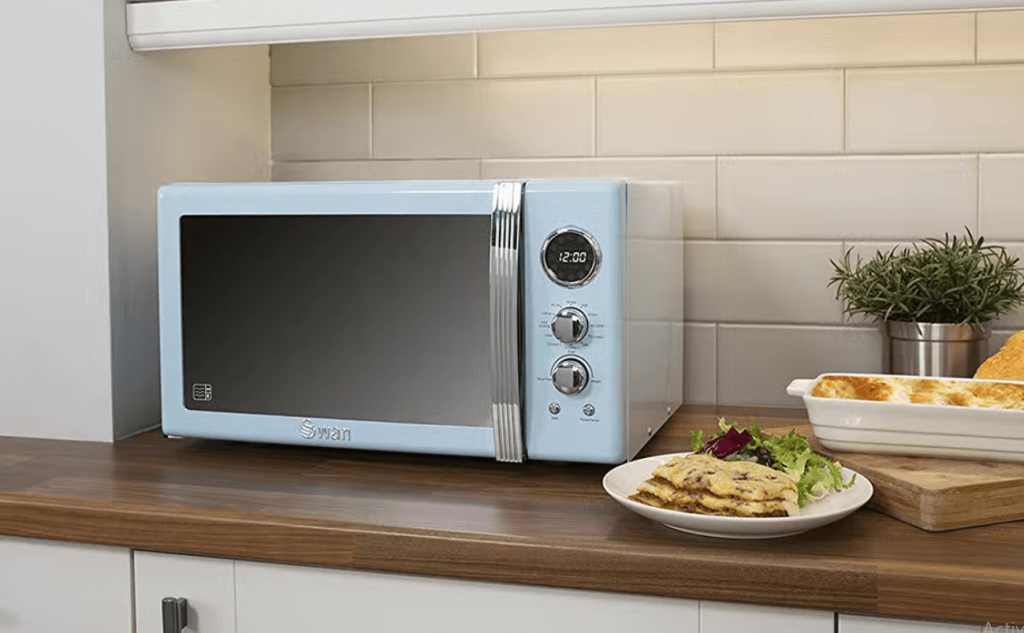
The microwave is a convenient appliance for heating and cooking food quickly. Here are some detailed steps for cleaning a microwave:
- Prepare a cleaning solution: Fill a microwave-safe bowl with a solution of equal parts water and white vinegar. You can also add a few drops of lemon juice or a slice of lemon to help freshen the microwave.
- Microwave the solution: Place the bowl in the microwave and microwave on high for five minutes. The solution will heat up and create steam, which will help to loosen any food particles or stains inside the microwave.
- Let the solution sit: After microwaving, let the bowl sit inside the microwave for a few minutes to allow the steam to further loosen any grime.
- Wipe down the interior: Use a damp sponge or cloth to wipe down the interior of the microwave. Be careful, as the bowl and interior surfaces will be hot. Pay extra attention to any stubborn stains or food particles.
- Clean the exterior: Use a damp cloth to wipe down the exterior of the microwave, including the door and control panel.
- Clean the turntable: Remove the turntable and wash it in warm soapy water. If the turntable is glass, handle it carefully to avoid cracking or breaking it.
- Reassemble: Once the microwave and turntable are clean and dry, reassemble them.
It’s a good idea to clean the microwave at least once a week to prevent the buildup of food particles and bacteria. If you notice any particularly stubborn stains or smells, you can also use a mixture of baking soda and water to scrub the interior of the microwave.
4. Dishwasher

The dishwasher is a time-saving appliance that can make cleaning up after meals much easier. Here are some detailed steps for cleaning a dishwasher:
- Empty the dishwasher: Start by removing any dishes, utensils, or other items from the dishwasher.
- Remove and clean the filters: The filters in the dishwasher help to trap food particles and prevent them from clogging the drain. Remove the filters and rinse them under hot water to remove any food particles.
- Check and clean the spray arms: The spray arms distribute water throughout the dishwasher to clean the dishes. Check to make sure the spray arms are not clogged with food particles or other debris. You can clean them by using a toothbrush or other small brush to remove any buildup.
- Run a cycle with vinegar: Place a cup of white vinegar in a dishwasher-safe container on the top rack of the dishwasher. Run a normal cycle with hot water. The vinegar will help to remove any buildup or stains inside the dishwasher.
- Clean the exterior: Use a damp cloth to wipe down the exterior of the dishwasher, including the door and control panel. Pay extra attention to any stubborn stains or fingerprints.
- Clean the seal: The rubber seal around the dishwasher door can collect food particles and bacteria over time. Use a toothbrush or small brush to scrub the seal with a mixture of baking soda and water.
- Clean the interior: Use a damp sponge or cloth to wipe down the interior of the dishwasher, paying extra attention to any stains or buildup.
- Run a final cycle: After cleaning, run a final cycle with hot water to rinse away any remaining cleaner or vinegar.
It’s a good idea to clean the dishwasher every one to three months, depending on how frequently you use it. Regular cleaning will help keep your dishwasher running efficiently and prevent the buildup of bacteria and other harmful germs.
5. Blender/Juicer

Blenders and juicers are important kitchen appliances for making smoothies, juices, and other drinks. Here are some detailed steps for cleaning a blender or juicer:
- Unplug the appliance: Make sure the blender or juicer is unplugged from the power source before starting to clean it.
- Disassemble: Remove any removable parts, such as the blade, jar, lid, and other accessories.
- Rinse: Rinse the jar, blade, and other removable parts under running water to remove any food particles or juice pulp.
- Soak: If there are any stubborn stains or buildup, you can soak the parts in warm soapy water for a few minutes.
- Clean the blade: Use a small brush or toothbrush to clean the blade and remove any remaining food particles or pulp. Be careful not to cut yourself on the sharp blade.
- Wipe down the base: Use a damp cloth to wipe down the base of the blender or juicer, paying extra attention to any spills or stains.
- Reassemble: Once the parts are clean and dry, reassemble the blender or juicer.
It’s a good idea to clean the blender or juicer after each use to prevent the buildup of food particles or juice pulp. If you use it frequently, you may want to give it a deeper cleaning every few weeks or months. Additionally, some blenders and juicers may have dishwasher-safe parts, so be sure to check the manufacturer’s instructions for specific cleaning recommendations.
Conclusion
Keeping your kitchen appliances clean is important not only for their longevity but also for your health and safety. Regular cleaning of appliances such as the refrigerator, oven, microwave, dishwasher, blender, and juicer can prevent the buildup of food particles and bacteria, which can cause unpleasant odors and even illnesses. By following the detailed cleaning steps for each appliance, you can ensure that they are functioning properly and efficiently. Additionally, it’s important to read and follow the manufacturer’s instructions for cleaning and maintenance to avoid damaging the appliances. By keeping your kitchen appliances clean, you can enjoy delicious and healthy meals and drinks with peace of mind.